Figma
SVG motion plugin on Figma

September 30, 2023

In this article, we will be discussing all things SVG motion. Stay around to see what the plugin is used for, how to install it, how to use it, and much more.
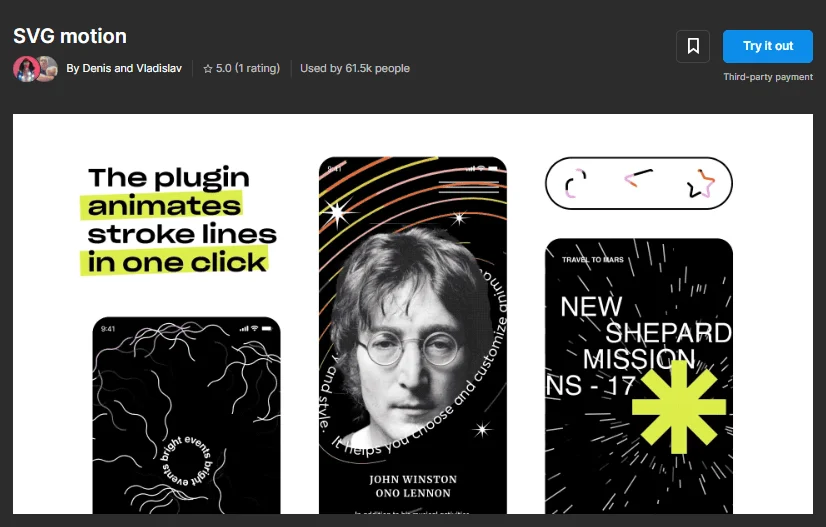
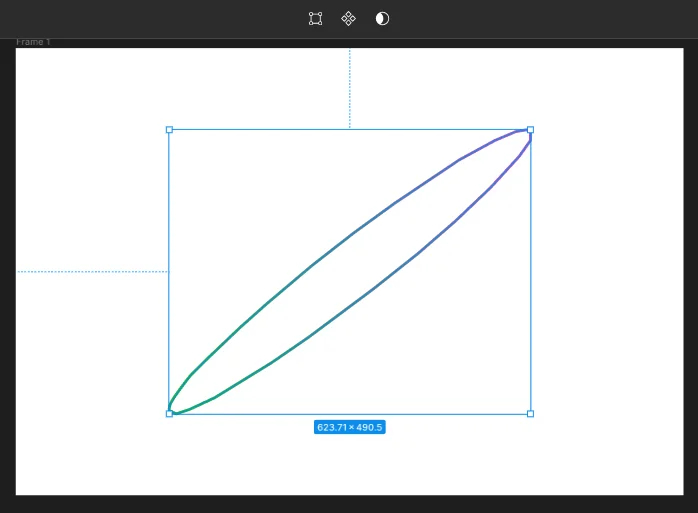
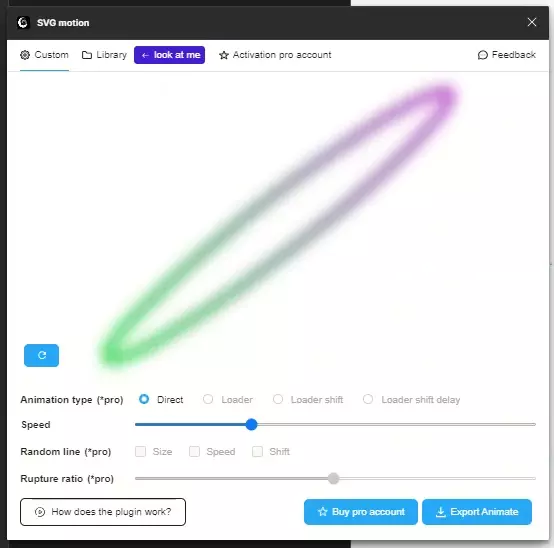
The SVG motion plugin of Figma allows you to animate strokes, quite beautifully if we may say so. You can draw with the pen tool, and the plugin will make your strokes come to life in one click.
Like this:
Even with this simplicity, it remains impressive. And you can do much more with it.
You may be wondering why it’s called an SVG motion plugin – well because it allows you to convert your animation to an SVG. SVGs are very useful in the design community, as they are fully editable and their resolution remains crisp clear no matter the size.
Oh, and they’re pretty compact too. Using the SVG motion plugin, your SVG animations will be no more than 150kb on average.
While the main function of the plugin is to animate strokes in Figma, there is plenty you can do with this feature. You can trace anything you want, and then animate it. This gives us an endless amount of possible creations.
You can animate text, for example, by using the pen tool over an already-existent body of text and then masking it. You can animate an icon, simple designs – anything that you can trace over, you can animate.
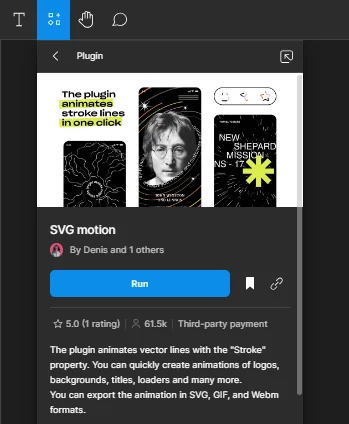
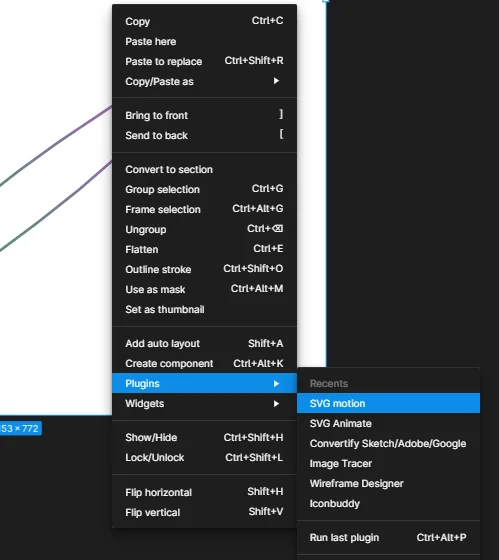
You can install the SVG motion plugin like any other plugin in Figma. Visit the official page of the plugin on the Figma community site, and click Try it out. Don’t forget to click the Save button next to it, so you can easily use the plugin anytime you want.
Make sure you are logged in to your Figma account, and the plugin tab should open itself on a blank canvas. Just press Run, and you’re done.
We will be showing you a brief walkthrough of how to use this plugin, so you know where to start.
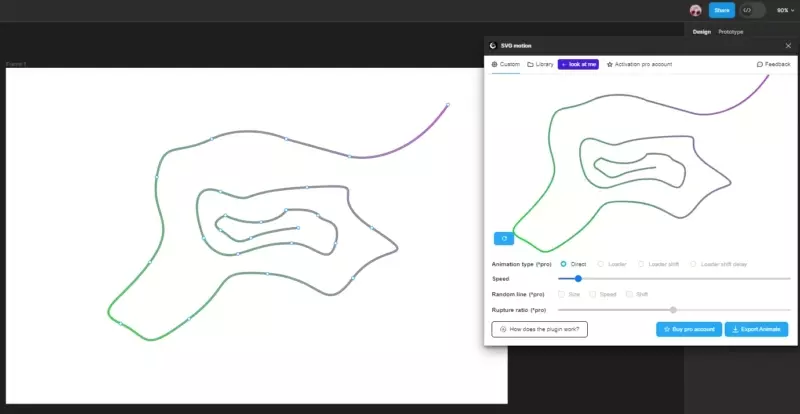
Use the pen tool to create or trace any object of your choice.
If you have the Pro version of the plugin, you have more settings to adjust. With the free version, the plugin allows you to adjust the speed of your animation only.
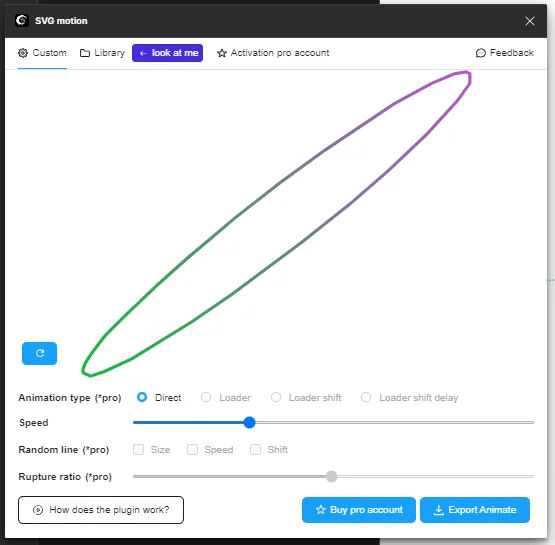
You have multiple ways of exporting the animation.
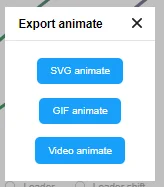
You can export the animation as SVG, GIF, or video (.webm). We would suggest SVG since it reduces the size of the animation but the quality remains the same. This means your design will load quickly every time.
Drag & drop the file into your Figma project. Keep in mind that Figma’s free version doesn’t allow you to place videos on your canvas.
(OPTIONAL) Before animating your design, you can add effects to it. This way, you can showcase your creativity and discover new ways how to use the plugin.
Here, we used the Layer blur. But you could also use Drop shadow or Inner shadow. The SVG Motion plugin doesn’t yet support using the Background blur option on your animations.
The SVG Motion plugin is a great way to level up your designs in Figma. Animations are a sure way to grab attention and make your design look more appealing. The options this plugin offers are limitless, especially when you consider the use of effects to enhance your work even further. To top it off, the SVG Motion plugin allows you to export the animation in multiple file formats.
We hope this article gave you a clear and thorough review of the SVG Motion plugin on Figma.
If you are interested in learning more about Figma, feel free to check out our other resources. We have free and easy guides to follow, and plenty of other articles!
Sr. UI/UX Designer and Consultant with over 10+ years of experience working with Fortune 500, large enterprises and funded startups. Having worked on hundreds upon hundreds of design projects, collaborated with 40+ clients from all around the world and taught design to thousands of students I am very grateful that I have the opportunity to give back to the design community and help other become better designers.
Stay up to date with the latest design news and cutting-edge softwares, sent straight to your inbox!
.jpg)

.jpg)
.jpg)